How to setup Azure / Microsoft 365 audit logs in EventSentry using Delimited Log File Monitoring
EventSentry provides the ability to monitor Azure logs, which is crucial for maintaining security and compliance within your organization. By keeping a close eye on these logs, you can detect suspicious activities, ensure data integrity, and respond quickly to potential threats. In the example below we will automate the download of AzureAd / Entra ID and Azure Sign-in logs.
Azure Configuration
Creating an App Registration with API access is necessary to securely authenticate and authorize the download of Azure logs. This ensures that EventSentry can retrieve log data from Azure in a controlled and secure manner.
For accessing logs, your App Registration will need the following permissions:
• AuditLog.Read.All
• Directory.Read.All
Follow the KB-518 to configure an App Registration with API Access:
https://www.eventsentry.com/kb/518-how-to-enable-api-access-to-microsoft-entra-id-azuread
EventSentry Configuration
In EventSentry, the workflow involves creating a Delimited Log File definition to specify the structure of the Azure logs. Once the definition is configured, we will setup an automated script to pull the Azure logs and import them every day.
Step 1:
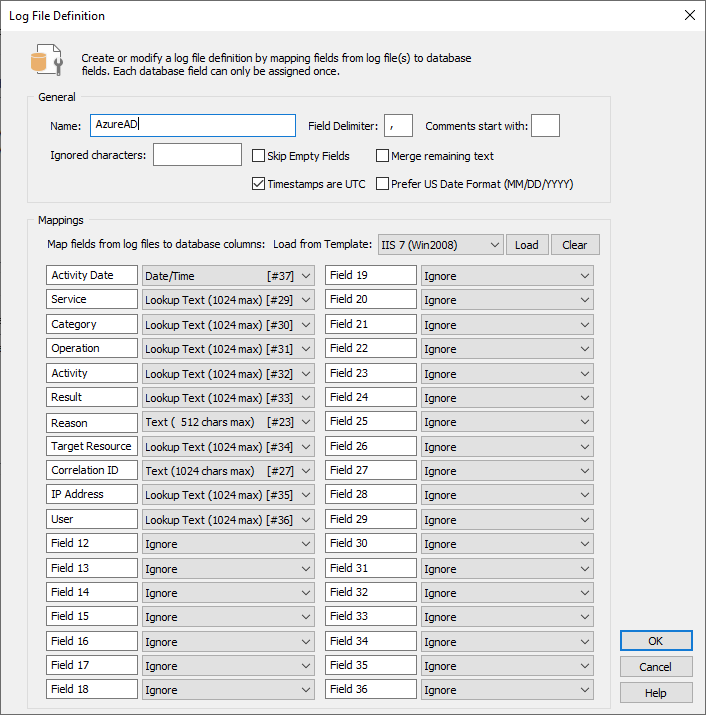
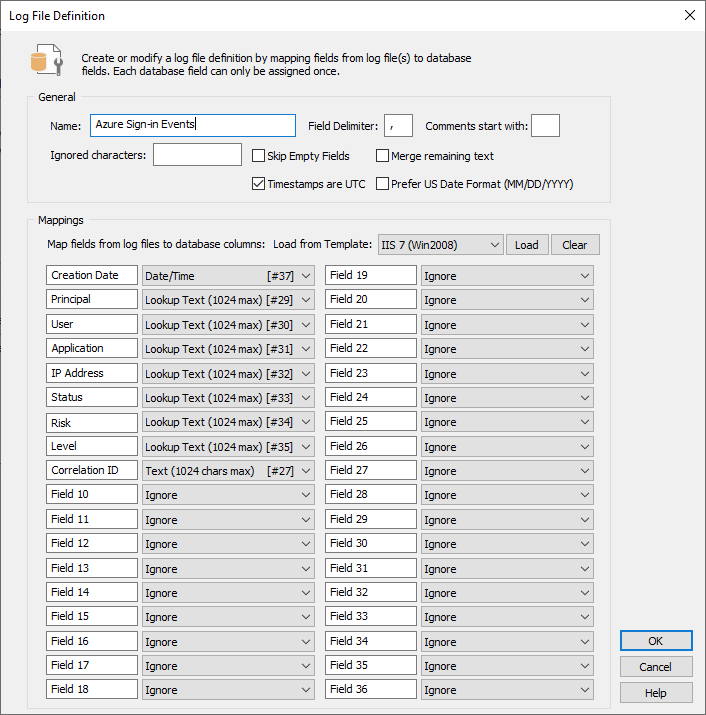
Create the Log File Definition:
- Open the EventSentry Management Console 2. In the tree on the left, navigate to Packages -> Log Files
- Right click Log Files and select Define Files and File Types
- In the Log File Definition section click the [+] button
Azure AD / Microsoft Entra logs
Azure Sign-ins
Step 2:
Create the Log File Type
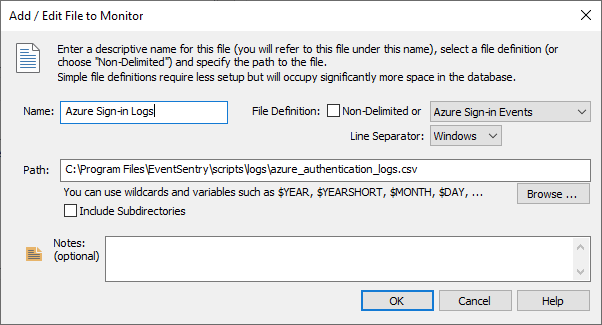
Under Packages -> Log Files -> Define Files and File Types, click the [+] in the Log Files section to add the Log File Types
Azure AD / Microsoft Entra logs
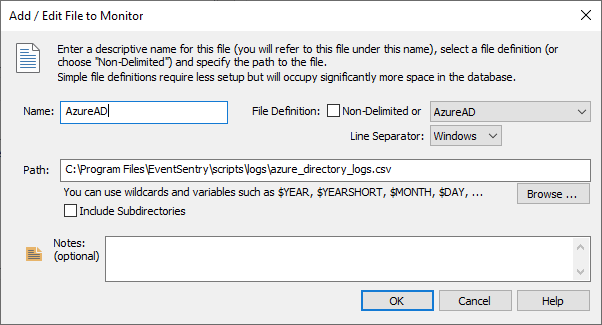
Azure Sign-ins
Step 3:
Assign the Log Files
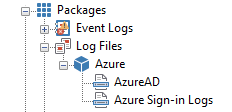
- Under Packages -> Log File, right click and select Add Package and name it Azure
- Right click the newly created Azure and select Add File 3. Add the recently created File Types to the package
- Assign them to the local server
- Save the configuration
Create the download script
Step 1:
Download Azure Log Download utility to download Azure logs
Save the downloaded file to %PROGRAMFILES%\EventSentry\scripts
Step 2:
Create a batch file
To complete the setup, you will need to:
- Replace the <client_id>, <client_secret>, and <tenant_id> placeholders with your actual App Registration in Azure.
- Adjust the <duration> parameter as needed to specify the time period for the logs you want to download. We will default to 1h.
These changes should be made in the batch file azure_log_importer.bat.
%PROGRAMFILES%\EventSentry\scripts\azure_log_importer.bat
1 2 3 4 5 |
@echo off :: EventSentry Azure Importer %PROGRAMFILES%\EventSentry\scripts\azure_log_downloader.exe -client_id <client_id> -client_secret <client_secret> -tenant_id <tenant_id> -log_type all -duration 1d %PROGRAMFILES%\EventSentry\eventsentry_db_import_x64.exe /file:"C:\Program Files\EventSentry\scripts\logs\azure_directory_logs.csv" /filedefinition:AzureAD /action:"Primary Database" %PROGRAMFILES%\EventSentry\eventsentry_db_import_x64.exe /file:"C:\Program Files\EventSentry\scripts\logs\azure_authentication_logs.csv" /filedefinition:"Azure Sign-in Events" /action:"Primary Database" |
Step 3:
Schedule the import script
To ensure that your Azure logs are regularly imported into EventSentry, you need to schedule the script that pulls the logs. This can be done using either the EventSentry Application Scheduler or the Windows Task Scheduler.
EventSentry Application Scheduler (Recommended)
- Open the EventSentry Management Console.
- Navigate to the "Packages" section and right click System Health and select Add Package
- Add the name of the package, we will call it Azure Log Import
- Right click the newly added package and click Add, then the Application Scheduler item
- Select Regular Schedule, select all days of the week and leave 00:00
- In the Process field select the batch script we recreated, azure_log_importer.bat
- Click "OK"
- Save the configuration
Windows Task Scheduler
- Open the Windows Task Scheduler.
- Click on "Create Basic Task" in the "Actions" pane.
- Enter a name and description for the task, then click "Next."
- Choose the trigger for the task daily and configure the schedule.
- Click "Next" and select "Start a Program" as the action.
- Click "Browse" and select the script azure_log_importer.bat that pulls the Azure logs.
- Click "Next," review the settings, and click "Finish" to create the task.
By following these steps, you ensure that the script runs at the specified intervals, allowing EventSentry to import the Azure logs based on the predefined settings.