You will only need to follow these steps if you do not have certificate services running in your domain. If you already have a certificate server in your domain then you can skip this step.
Open "Server Manager":
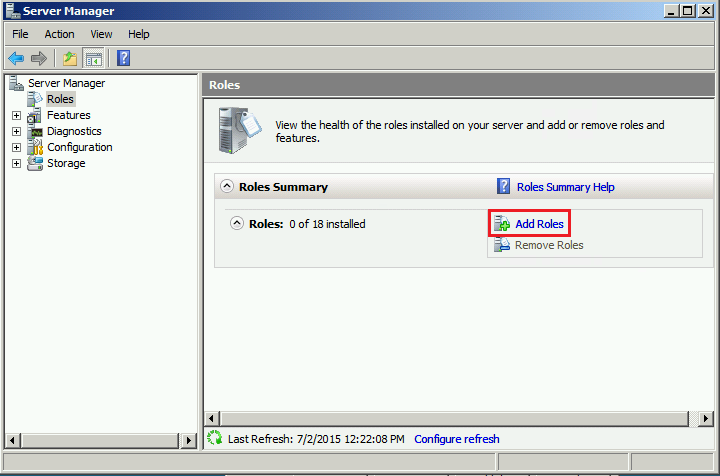
In "Server Manager" select Roles in the left pane, then Add Roles in the right pane.

Place a check mark in the check box for Active Directory Certificate Services. Click Next. On the ‘Introduction to Active Directory Certificate Services’ window, you can read up on the certificate services technology, how to manage a CA, and naming. Click Next.

On the ‘Select Role Services’ page, make sure Certification Authority is selected. Click Next.
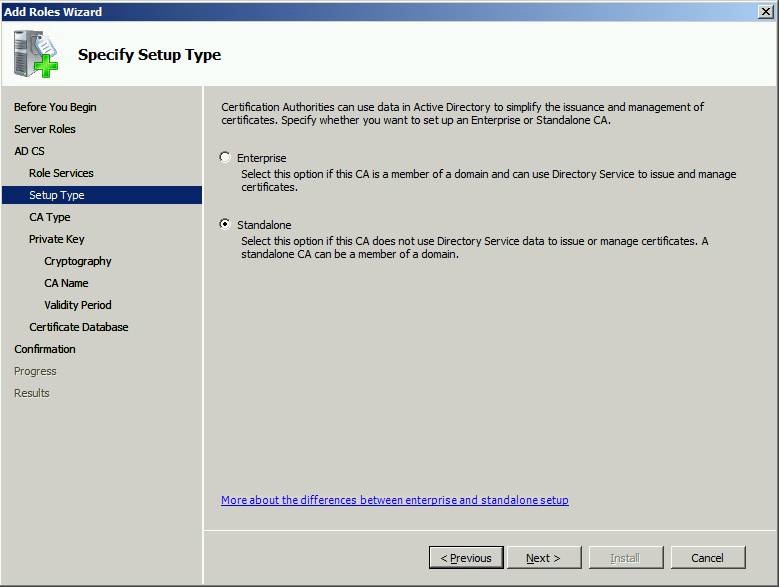
On the ‘Specify Setup Type’ page, select Standalone. Click Next.
|
The screen shots shown are based on the "Enterprise root CA" selection, there may be differences depending on the type of CA you select. |
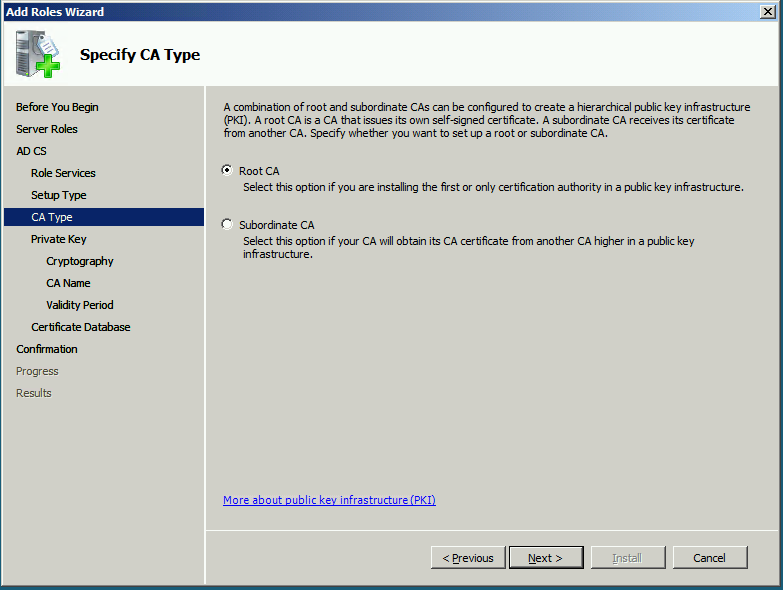
On the ‘Specify CA Type’ page, leave Root CA selected and click Next.
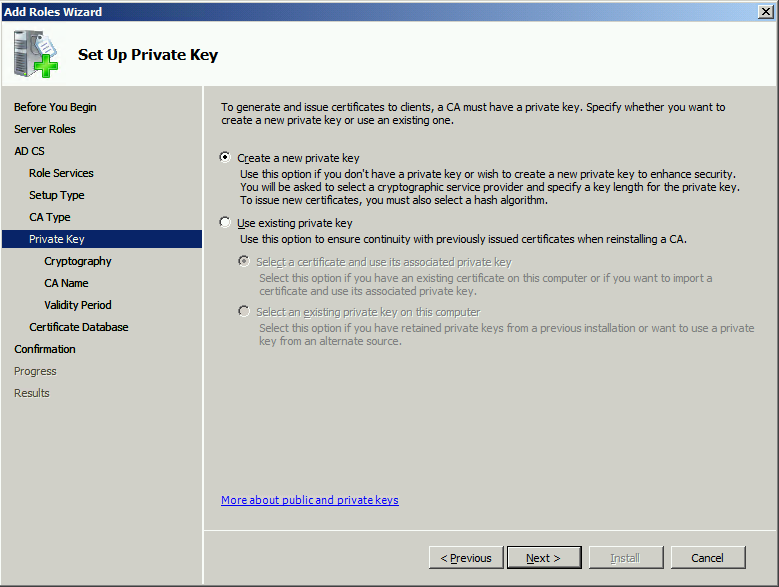
On the ‘Set Up Private Key’ page, leave Create a new private key selected and click Next.
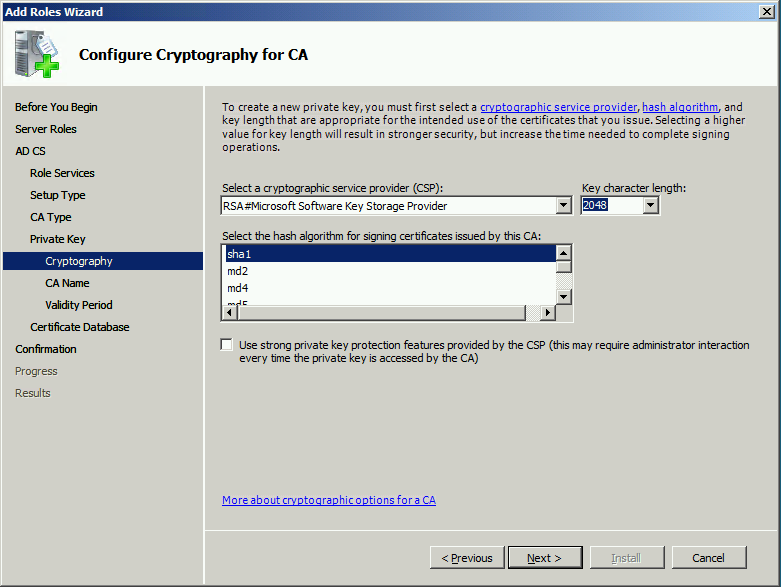
On the Configure Cryptography for CA page, leave the defaults selected or adjust as necessary and click Next.
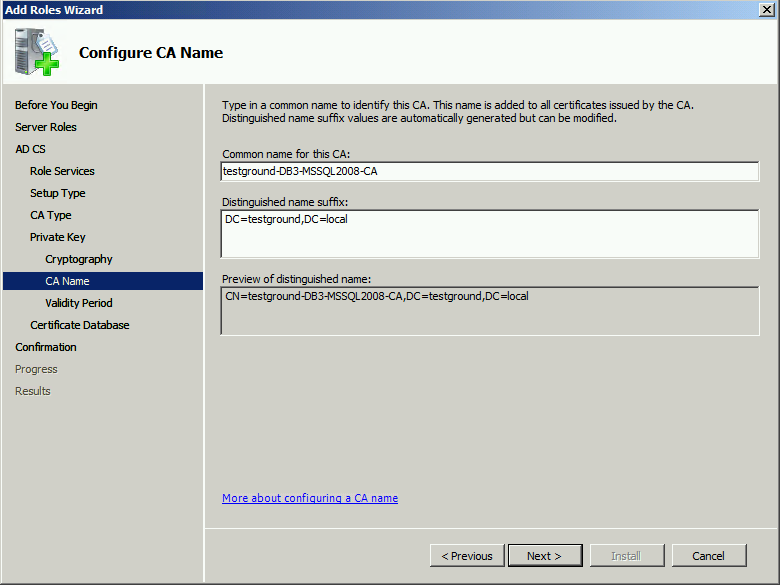
On the ‘Configure CA Name’ page, set the common name to the same as the server name. Click Next.
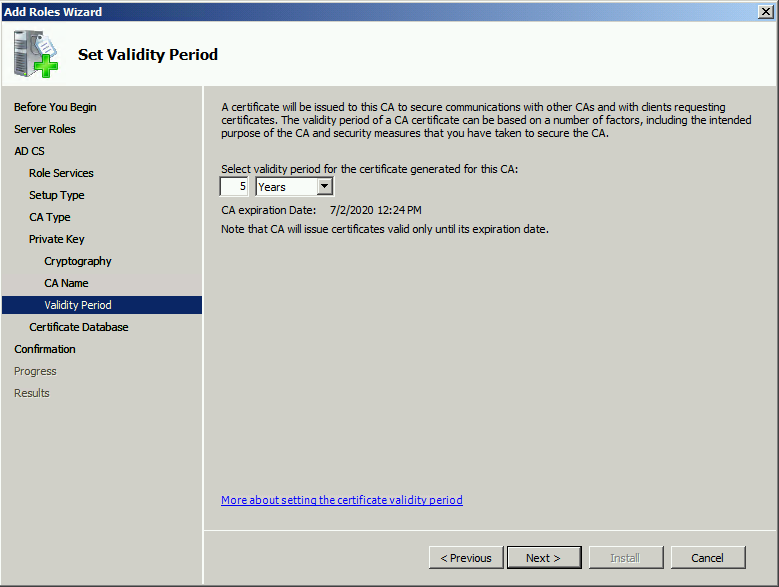
On the ‘Set Validity Period’ page, set to 5 years or adjust based on your needs. Click Next.
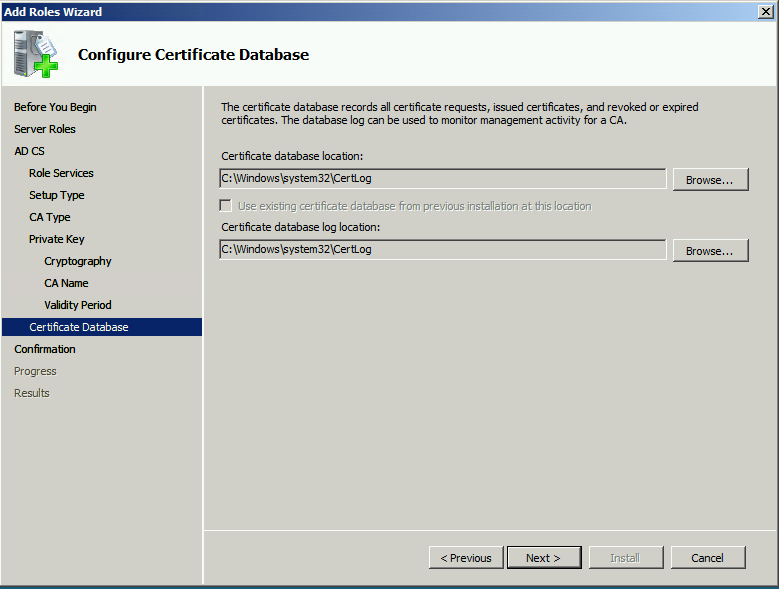
On the ‘Configure Certificate Database’ page, leave the defaults set or adjust to your needs. Click Next.
On the ‘Confirm Installation Selections’ page, you can review your choices or click Back to make changes. Once satisfied click Next.
After the ‘Installation Progress’ page finishes, you can view your ‘Results’.
