How do I set up the database purge from Web Reports?
Starting in EventSentry 5.1, a new way to purge your database is available in Web Reports. This purge job runs more efficiently on large databases and is recommended over the "database purge" package in the console. If you first installed EventSentry on version 5.1 or later then the Web Reports purge should have been set up by default, but if you first installed an older version then you can follow these instructions to set it up.
1) Open Web Reports to Settings > Profile Editor
2) Scroll down to the "database connection" settings and make sure you add your "postgres" or "sa" admin username and password depending on if you're using postgres or MSSQL for your database. Click test connection and if it's successful, scroll to the bottom of the page and click submit.
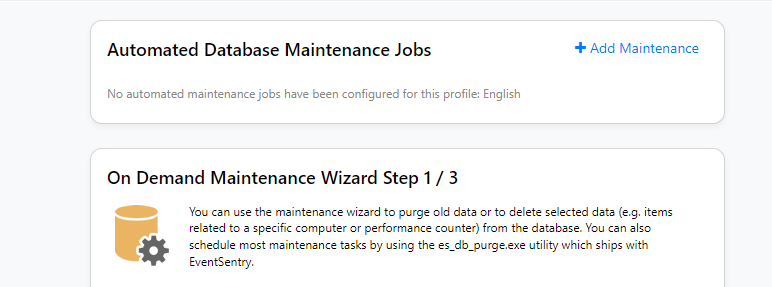
3) Click Settings > Maintenance Wizard
4) At the top of the page, click "Add maintenance"
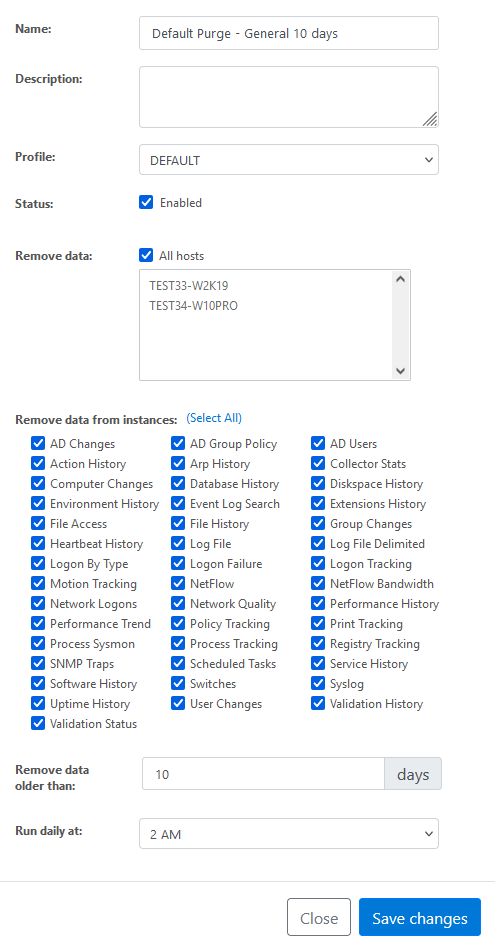
5) Select all hosts and instances, how many days of data you want to keep in your database, and the time you want the purge job to run. For example, if you want to keep 30 days worth of data then type 30 in the "remove data older than" box. The "profile" dropdown refers to the name of the profile in Web Reports.
6) With this set up, you can now open your EventSentry console to Packages > System Health > Database Purge then right click the "Database Purge" package in the tree and disable it. Remember to save your settings from Home > Save. Now the purge will run from Web Reports instead of the console. You can see the status of the last purge under Reports > Jobs in Web Reports. If there were any errors in the last run they will show up here under "Database Maintenance Jobs." You can also click "edit" next to the job to change the job settings, such as what machines are purged or the number of days in your retention period.


